Thinking about launching a blog or website from home but not sure where to start?
You’re not alone—and you’re definitely not too late.
In fact, setting up your own WordPress site is way easier than most people think… especially if you’re using Hostinger.
I’ve built several WordPress sites with Hostinger over the past few years—for freelance projects, niche blogs, and online business experiments. And what I love most?
It’s crazy fast to set up, dirt cheap to start, and beginner-friendly without feeling watered down.
This tutorial is made for people who work from home—freelancers, creators, side hustlers—who want a legit website that loads fast, looks good, and doesn’t break the bank.
Let’s get your site online today.
To set up a WordPress site on Hostinger:
- Sign up for a Hostinger WordPress hosting plan.
- Log in to hPanel and open the Auto Installer tool.
- Select WordPress, enter your site details, and click Install.
- That’s it—your site goes live with a free SSL and domain.
Want to dive deeper? Let’s start with choosing the right Hostinger plan for your new site.
Choose Your Hostinger WordPress Hosting Plan (What I Recommend)
Before you can install WordPress, you’ll need a hosting plan. The good news? Hostinger makes this super simple—even if you have no idea what “shared hosting” or “cloud hosting” means.
For most people working from home—whether you’re starting a blog, building a portfolio, or launching a simple business site—I recommend going with one of Hostinger’s WordPress hosting plans.
Here’s a quick breakdown of your options:
🔸 Single WordPress Hosting (Best for just 1 site)
- 1 website
- Free SSL
- Weekly backups
- 30 GB storage
- ~$2.99/month (if paid annually)
🔸 WordPress Starter (Best value for most beginners)
- Up to 100 websites
- Free domain for 1 year
- Free SSL
- Daily backups
- 100 GB storage
- ~$3.99/month (with 48-month discount)
🔸 Business WordPress (If you want speed + daily backups)
- Everything in Starter, plus:
- Increased speed (more resources)
- Free CDN
- 200 GB storage
- ~$4.99/month
💡 My take:
If you’re just starting and want one site, go with WordPress Starter. You get everything you need—including a free domain, free SSL, and daily backups (huge for peace of mind)—without overspending.
How to Choose the Right Plan
Ask yourself:
- Am I building just one site or multiple?
- Do I need daily backups or is weekly okay?
- Will I need extra speed or storage for big traffic or lots of media?
If you’re a solo business owner or freelancer just getting started, the WordPress Starter plan is more than enough to grow with you.
✅ Bonus: Hostinger frequently offers deals up to 80% off, so check their pricing page before locking anything in.🆚 Hostinger WordPress Plans: Quick Comparison
| Plan | Websites | Free Domain | Backups | Storage | Best For |
|---|---|---|---|---|---|
| Single | 1 | ❌ | Weekly | 30 GB | Personal site or blog |
| WordPress Starter | Up to 100 | ✅ | Daily | 100 GB | Freelancers, side hustlers, small biz |
| Business WordPress | Up to 100 | ✅ | Daily + CDN | 200 GB | Growing sites, image-heavy content, SEO pros |
💡 All plans include:
- Free SSL
- Managed WordPress tools
- LiteSpeed caching
- 1-click installer via hPanel
How to Install WordPress on Hostinger (Step-by-Step)
This is where the magic happens: getting your site online in minutes using Hostinger’s one-click WordPress installer.
No confusing tech. No FTP. No stress.
Let’s walk through it:
✅ Step 1: Log in to Your Hostinger Account
Once you’ve purchased your plan, go to hostinger.com and log into your account.
You’ll land in your dashboard, called hPanel — Hostinger’s custom-built control panel that’s way easier to use than old-school cPanel.
✅ Step 2: Access the Auto Installer in hPanel
Inside hPanel, scroll down to the “Website” and click the Add Website button.
From the list of available platforms, choose WordPress. This will launch the Auto Installer.
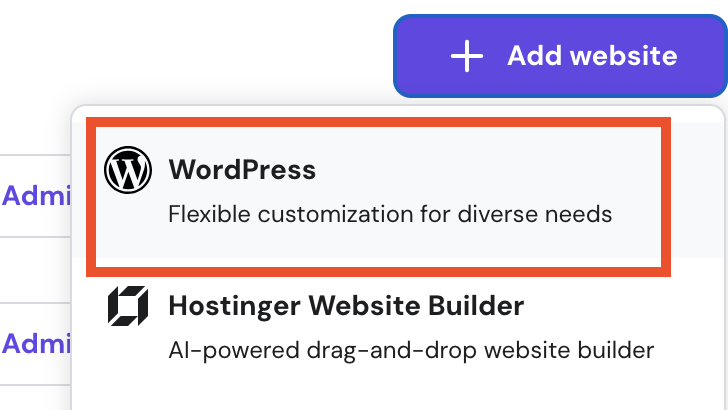
💡 This is the official one-click WordPress install feature — no downloads or ZIP files needed.
✅ Step 3: Add Site Security Credentials
- Enter Admin Username and Password: These will be your WordPress login credentials
- Then click the Next button.
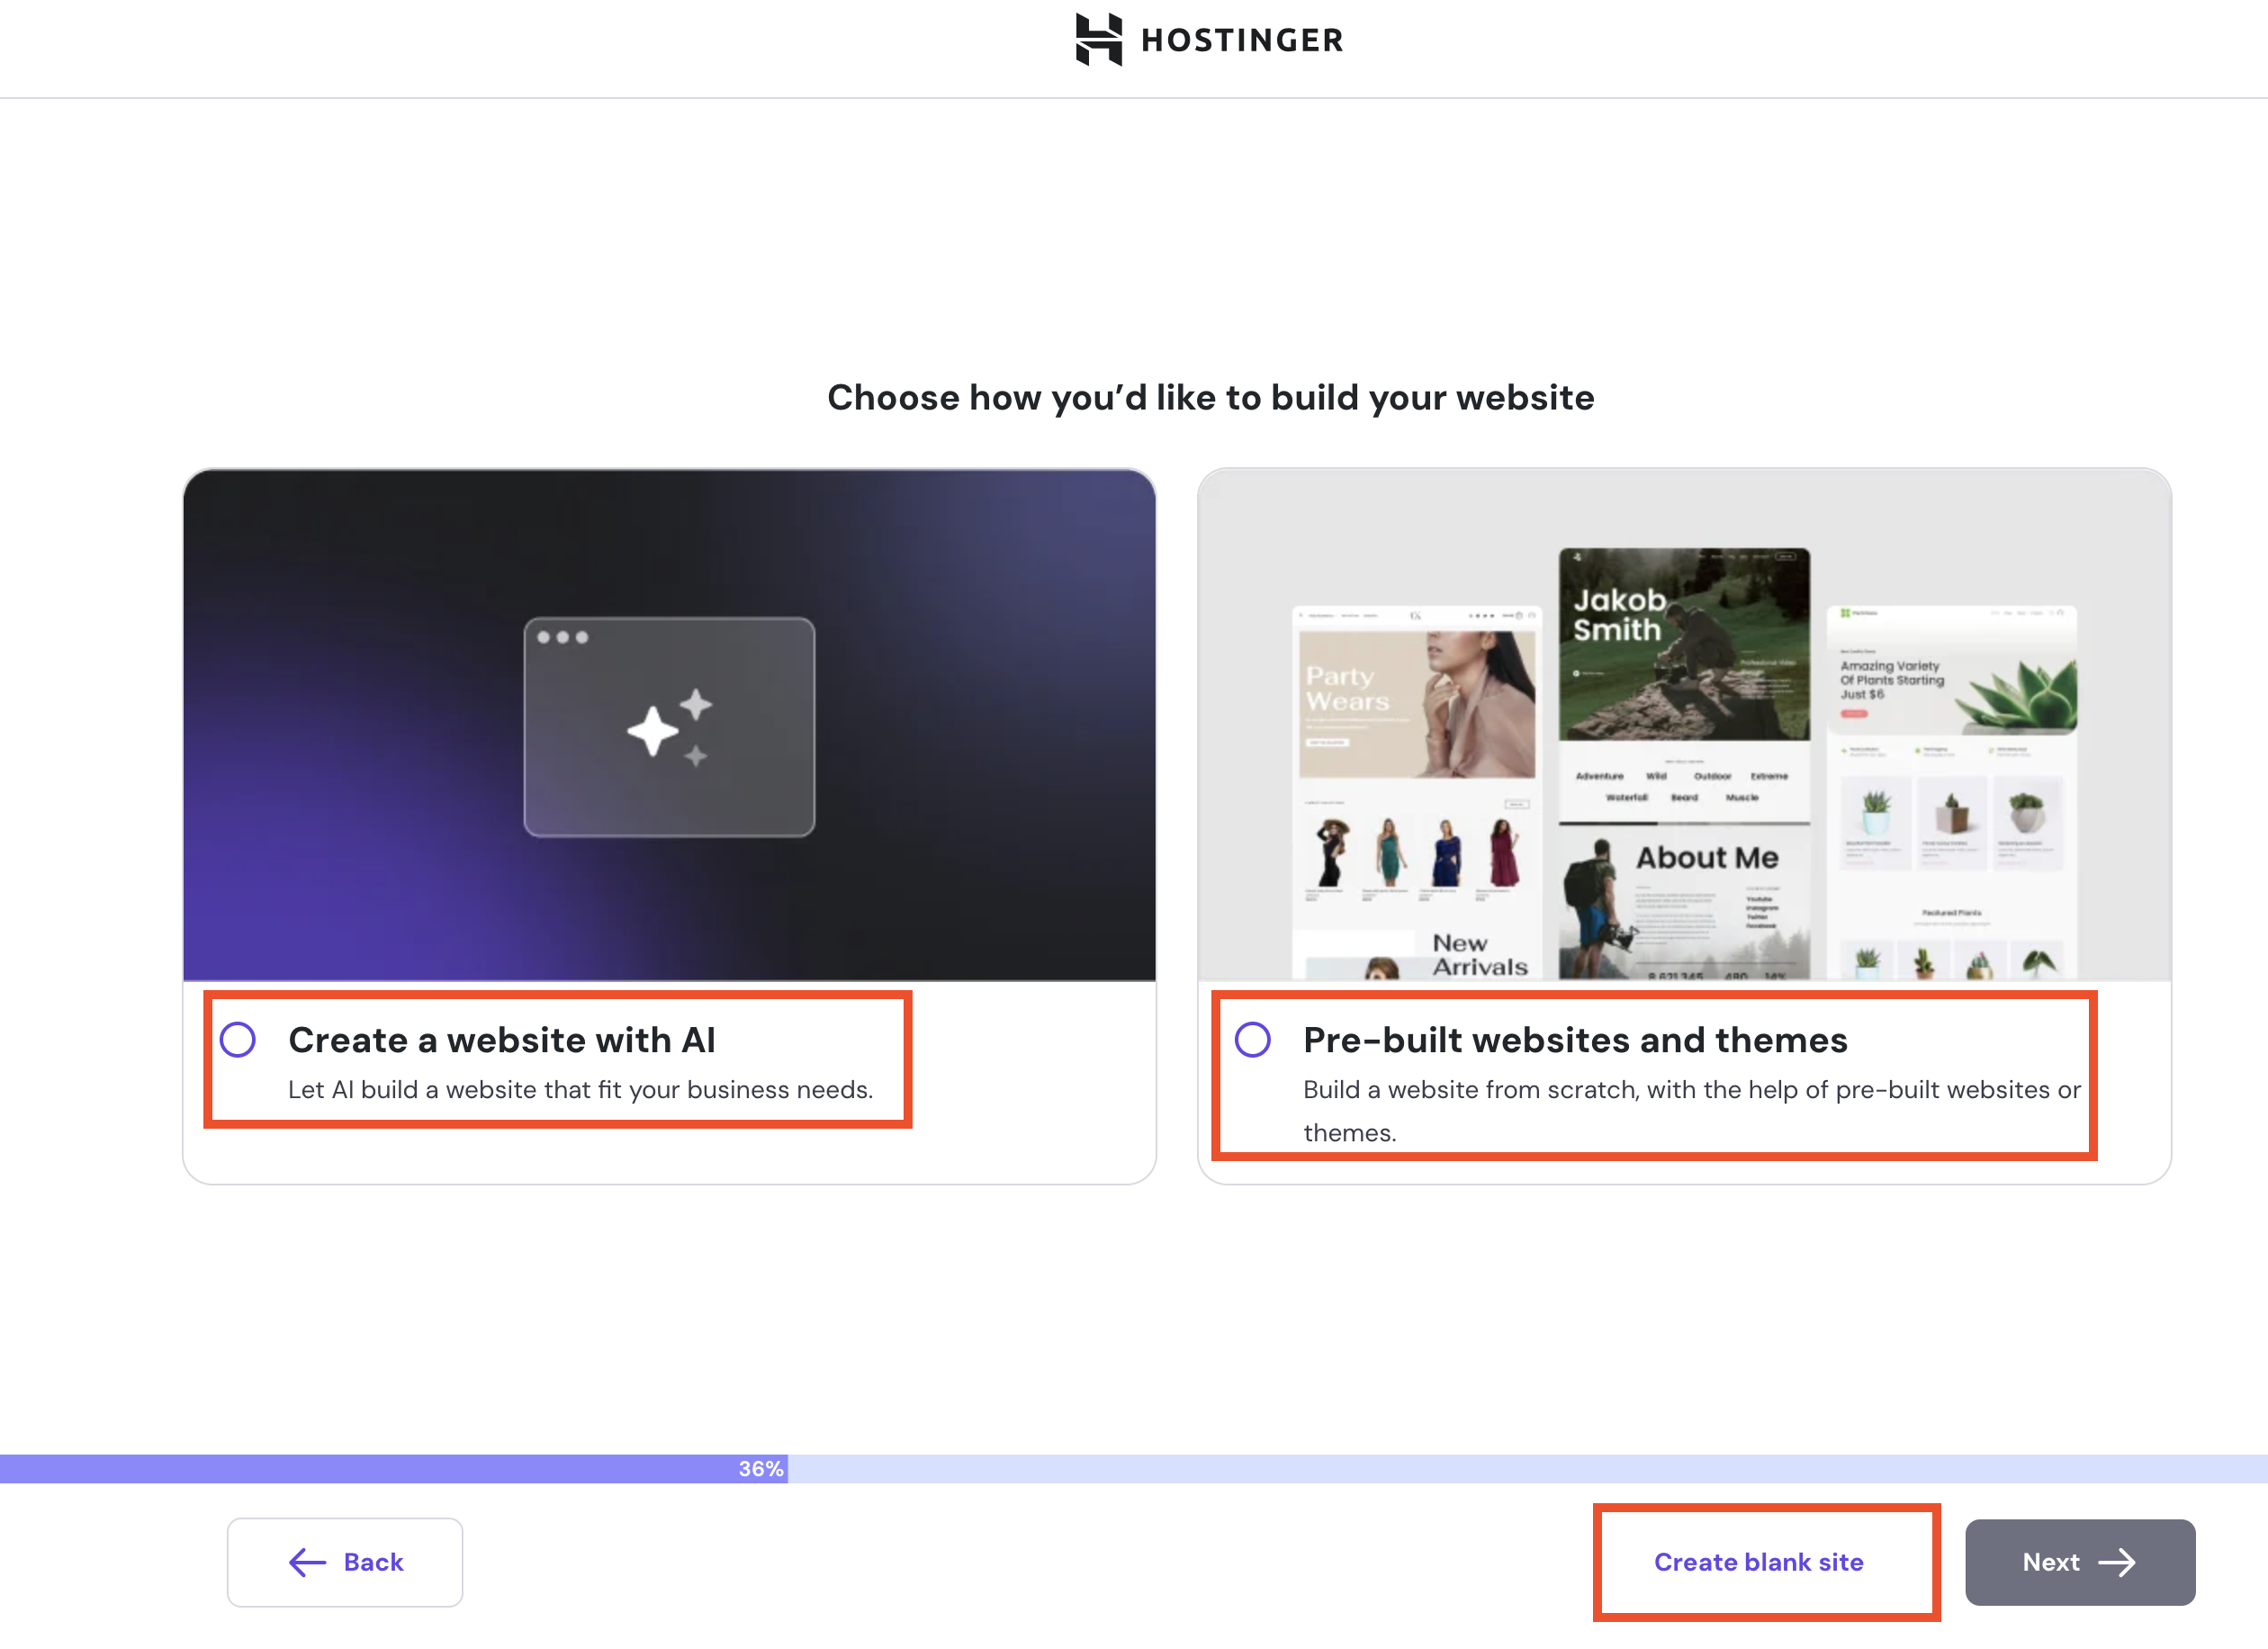
✅ Step 4: Choose How You Want Your Site Created
- Create Your Website with AI – This option will build the website for you from a description you enter.
- Pre-built websites and themes: This option will allow you to select a prebuilt look or theme for your site before installation.
- Create Blank Site: This will create a default WordPress installation – my favorite option.
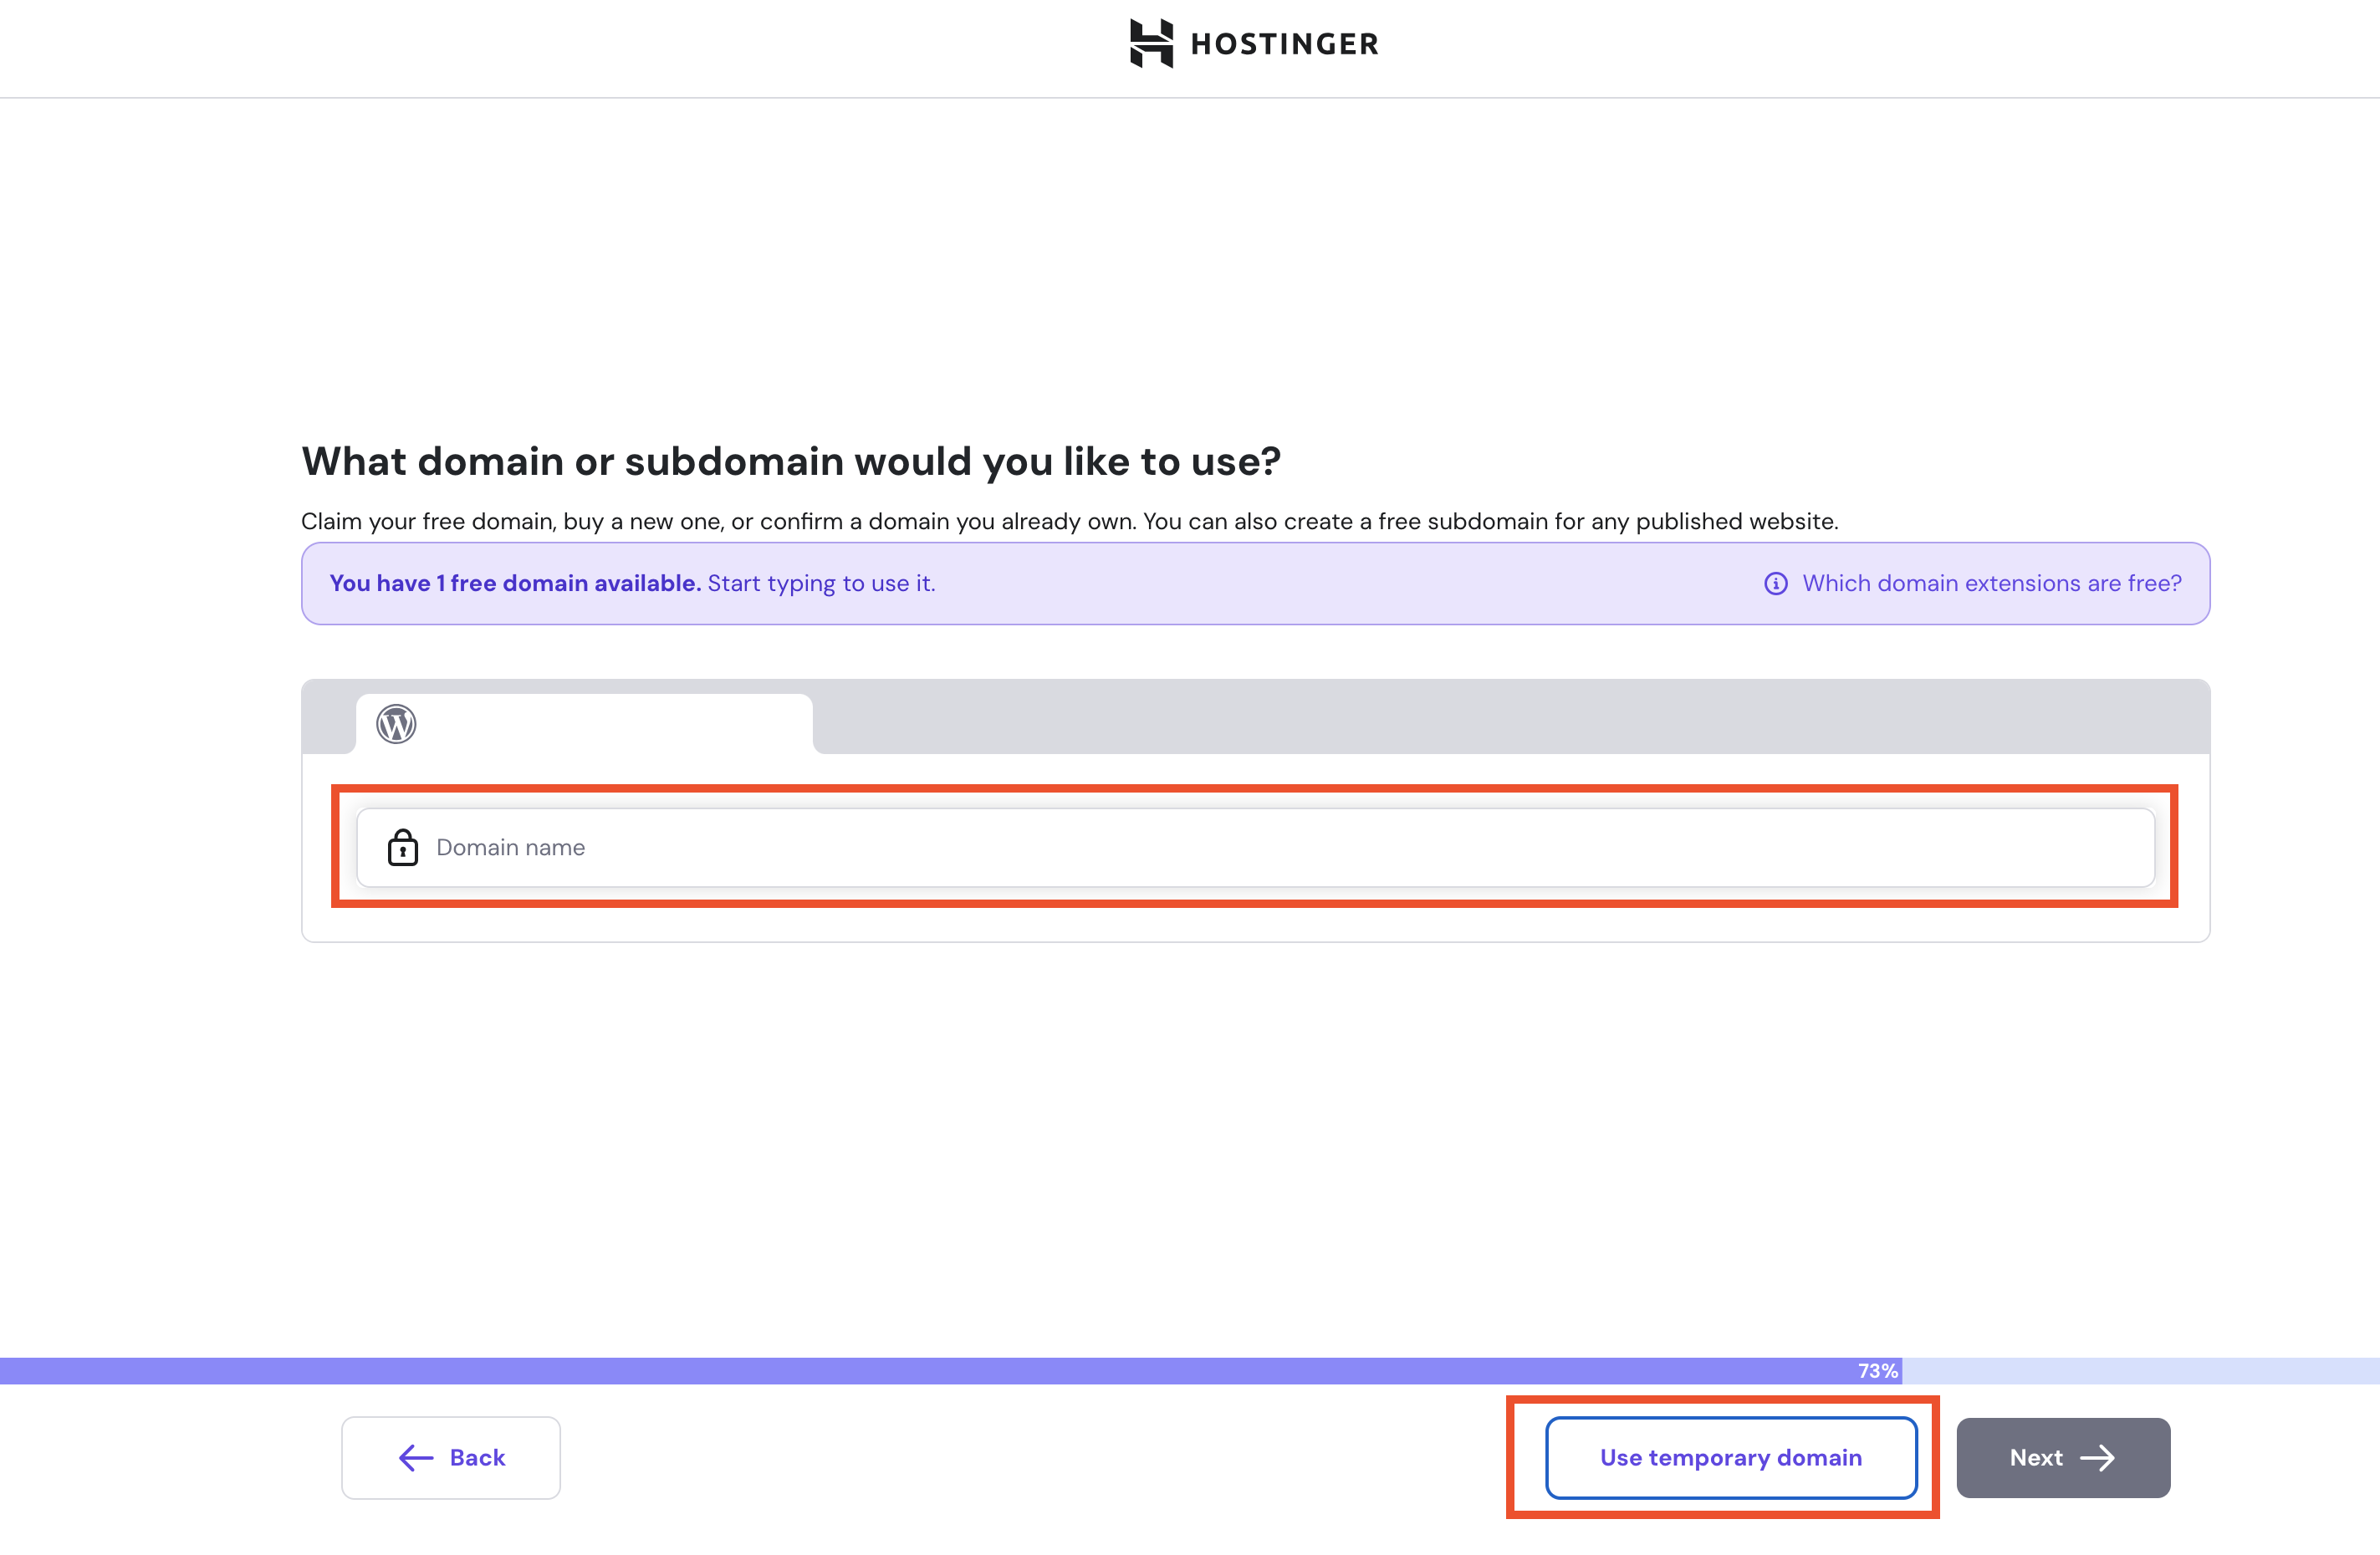
✅ Step 5: Enter Your Domain
Enter your domain here and Hostinger will configure your site for it. If your domain is with another registrar, you will need to also point your nameservers to Hostinger.
(If you do not have a domain yet, you can have Hostinger set up your site on a temporary domain so you can start working on it. Just click the Use Temporary Domain Button at the bottom of the screen).
✅ Step 6: Your Admin URL
After installation, you’ll be taken to your site dashboard at the default WordPress admin URL — it’ll look like this:yourdomain.com/wp-admin
You should be automatically logged in, but if not, click the link and log in using the username and password you just created.
Boom. You’re in.
🧠 Pro tip:
Your WordPress admin URL will look like this:yourdomain.com/wp-admin
Bookmark your admin URL so you can quickly get back to your dashboard later.
After Installation: Setting Up Your WordPress Site (Next Steps)
Congratulations on installing WordPress! Now, let’s customize your site to make it uniquely yours.
🎨 Step 1: Choose a Theme That Matches Your Vibe
Your theme determines your site’s appearance and layout. Here’s how to select one:
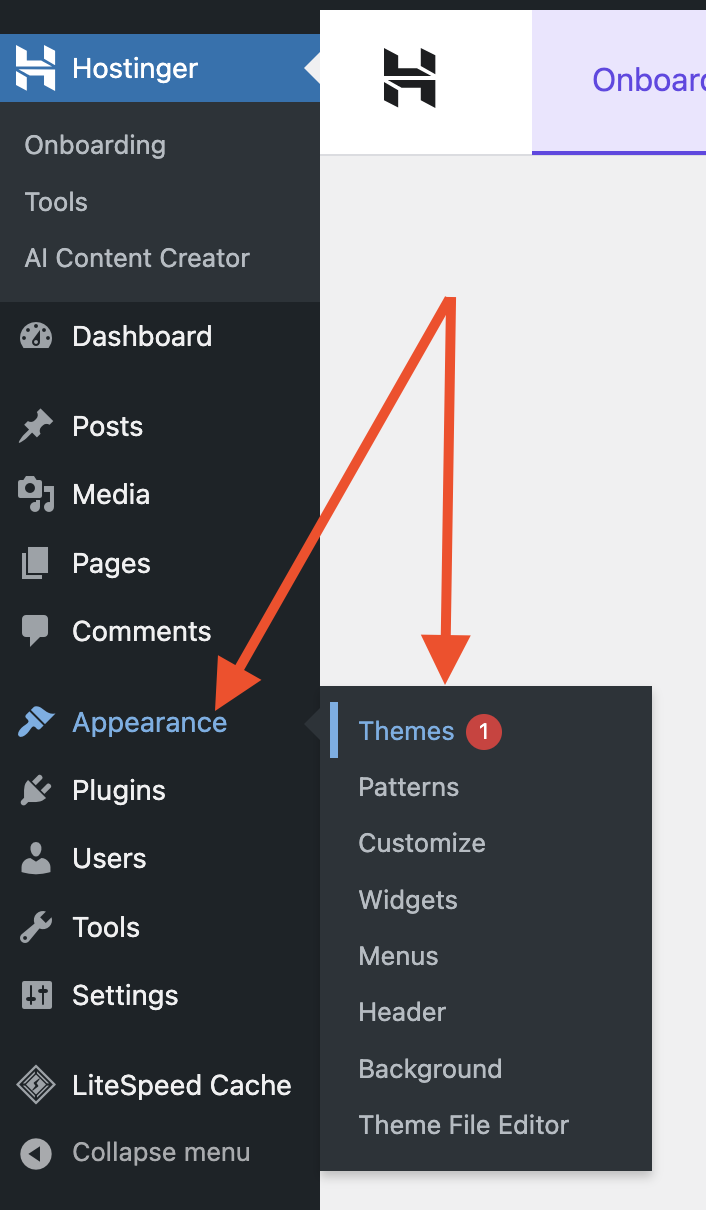
- Access Theme Options: From your WordPress dashboard, navigate to Appearance → Themes. Screenshot Placeholder
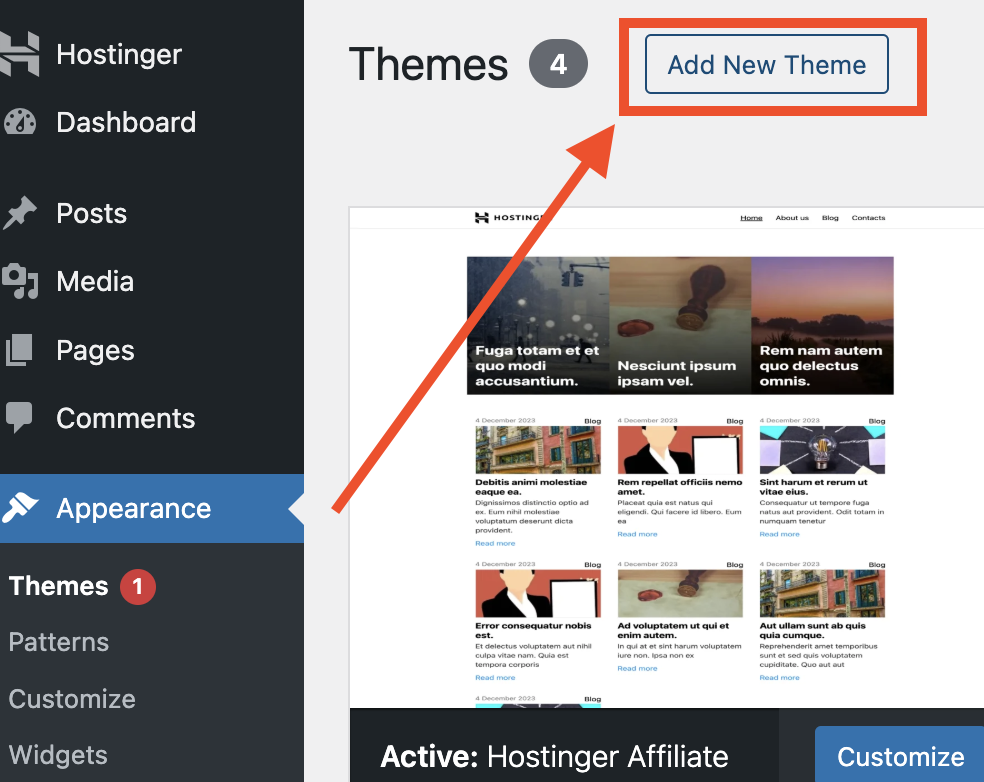
- Add New Theme: Click on Add New to explore available themes. Screenshot PlaceholderAlt Text: ‘Add New’ button in the Themes section of WordPress dashboard.
- Browse and Install: Browse or search for free themes (e.g., Astra, Kadence, Blocksy). Once you find one you like, click Install, then Activate. Screenshot PlaceholderAlt Text: Theme installation screen showing ‘Install’ and ‘Activate’ buttons.
💡 Tip: Choose a lightweight, mobile-responsive theme to ensure fast loading times and a better user experience.
🔌 Step 2: Install Essential Plugins
Plugins add functionality to your site. Here’s how to install them:
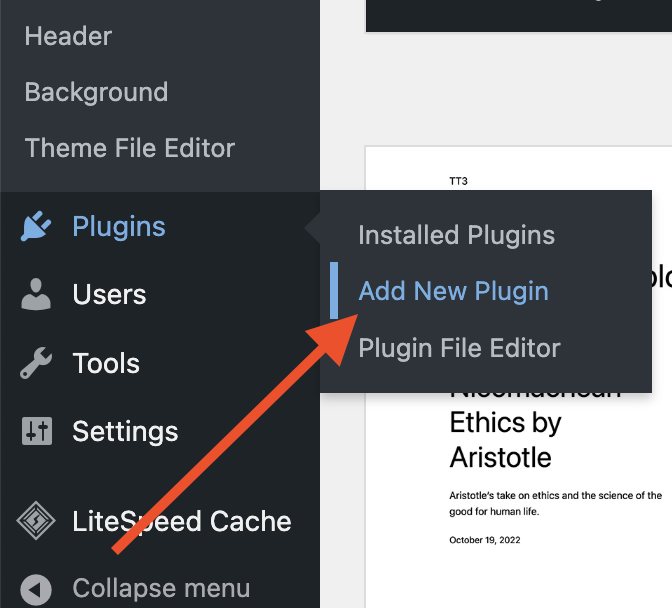
- Navigate to Plugins: From your dashboard, go to Plugins → Add New.
- Search and Install: Use the search bar to find the desired plugin. Click Install Now on the plugin you wish to add.
- Activate the Plugin: After installation, click Activate to enable the plugin on your site.
Here are some recommended plugins for beginners:
| Plugin | Functionality |
|---|---|
| Rank Math | SEO optimization |
| WP Super Cache | Site speed enhancement |
| UpdraftPlus | Backup and restore capabilities |
| Contact Form 7 | Create and manage contact forms |
🧠 Note: Install only necessary plugins to maintain optimal site performance.
🛡️ Step 3: Secure and Configure Your Site
Enhance your site’s security and optimize settings:
- Enable SSL: Ensure your site has an SSL certificate for secure connections. Hostinger provides free SSL certificates. Screenshot Placeholder Alt Text: SSL activation section in Hostinger’s hPanel dashboard.
- Search and Install: Set Permalinks: In WordPress, go to Settings → Permalinks and select Post name for cleaner URLs. Screenshot Placeholder Alt Text: Permalink settings page in WordPress with ‘Post name’ option selected.
- Delete Default Content: Remove the default “Hello world!” post and sample page to start fresh. Screenshot Placeholder Alt Text: WordPress ‘Posts’ section showing the default ‘Hello world!’ post selected for deletion.
🚀 Step 4: Create Essential Pages
Start building your site’s content:
- Homepage: Set a static page or display your latest posts.
- About Page: Share information about yourself or your business.
- Contact Page: Provide a way for visitors to reach you.
🔑 Remember: Your site is live, but you can continuously update and refine it as you grow.
Why Hostinger Is Great for Work-From-Home Entrepreneurs
If you’re freelancing, consulting, blogging, or launching a digital side hustle from your kitchen table… you don’t need a complicated or expensive website setup.
You need something simple, fast, and affordable that just works.
That’s why Hostinger WordPress hosting is such a great fit for people working from home. Here’s why it stands out:
💸 It’s Budget-Friendly (Without Cutting Corners)
Most WFH folks are bootstrapping their first online presence. With plans starting at just a few bucks a month—and a free domain + SSL included—you can go live without burning through your savings.
🧠 It’s Beginner-Friendly, Even If You’re Not “Techy”
You don’t need to mess with cPanel or dig through tech forums. Hostinger’s hPanel is clean, simple, and actually makes sense. Their one-click WordPress install means you’re literally 3 steps from a live site.
🛡️ Daily Backups Give You Peace of Mind
Accidentally break your site while playing with plugins? No stress. With daily backups (on Starter and Business plans), you can roll things back in seconds.
🚀 It Loads Fast and Feels Pro
Thanks to LiteSpeed servers, Hostinger gives you great site speed without paying for “premium” hosting. This matters when visitors hit your site—and when Google decides how to rank it.
✅ Bottom line:
If you’re building a site from your couch, spare bedroom, or home office, Hostinger gives you pro-level hosting without the pro-level price tag.
Final Thoughts: Your WordPress Site Is Live — What’s Next?
You just set up a WordPress site on Hostinger in minutes.
No coding. No stress. No bloated bill.
Now you can start building your blog, portfolio, or business from the comfort of your home — knowing your hosting is fast, secure, and easy to manage.
If you want to go deeper on performance, pricing, and whether Hostinger is the best choice long-term, check out my full Hostinger review here. I share my experience hosting multiple sites, including where it shines and what to watch out for.
✅ Ready to launch your site today?
👉 Click here to get up to 80% off Hostinger WordPress hosting